
37 Malcolm RD, Braeside, VIC
10 Trailer Setup Ideas for Carpenters
20 November 2026 | roshartrailers
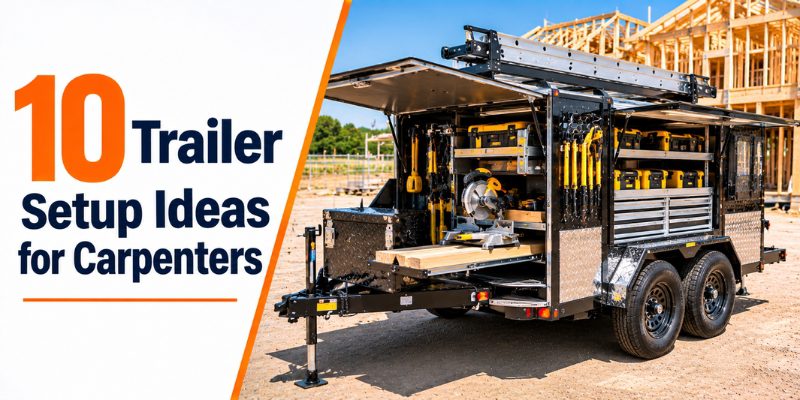
Table of Contents
By Writer :- Ron
Roshar Trailers Team, Trailer Manufacturing and Sales Specialists
Published: 20/11/2026
The best carpenter trailer setup combines secure tool storage, fast access, long-material handling and balanced load placement. For Australian carpenters, a tradesman trailer with drawers, shelving, ladder storage, tie-down points and weather protection can work as a practical mobile workshop.
A carpenter’s trailer needs to do more than carry tools. It should make it easier to move from the workshop to the job site without wasting time searching for equipment or repeatedly loading and unloading the ute.
The ideal layout will depend on the carpenter’s work. A framing carpenter may need more space for saws, levels and timber, while a finish carpenter may prioritise organised drawers for hand tools, fixings and smaller equipment.
What trailer setup works best for carpenters?
A carpenter usually benefits from a tradesman or enclosed trailer divided into clear zones for power tools, hand tools, fixings, long materials, safety equipment and job-specific gear. The best layout keeps high-use items accessible while protecting valuable equipment.
The right setup depends on what type of carpentry you do and how often your equipment moves between sites.
A carpenter working mainly on renovations may need space for saws, drills, levels, fixings and dust-control equipment. A framing carpenter may need greater capacity for larger tools and materials. A cabinetmaker may need more protection for finished components and precision equipment.
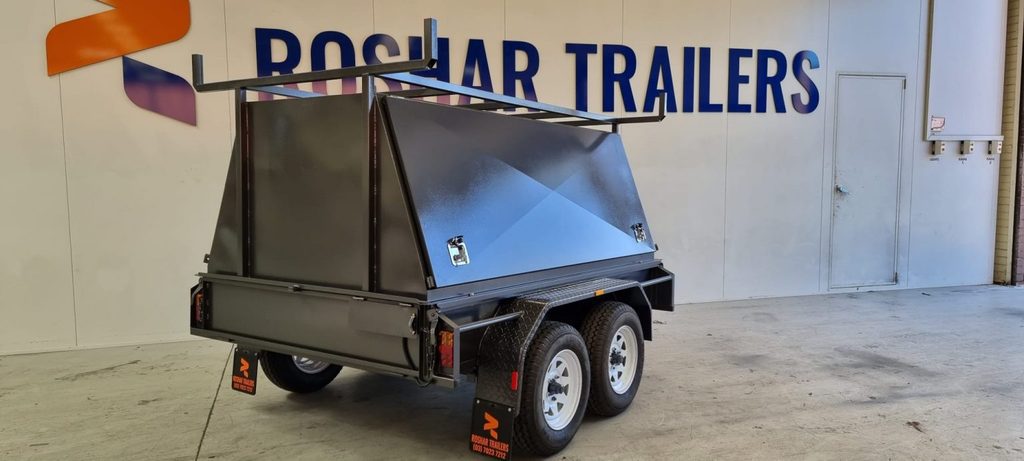
Roshar’s 8×5 tradesman trailer is one example of a platform that can be configured for carpenters and builders, with a heavy-duty chassis, chequer plate floor, tie rails and space that can be planned around tools and work equipment. Final tare, ATM, GTM, payload and braking configuration should always be confirmed for the selected build.
Carpenter trailer setup comparison
| Setup | Best for | Main advantage | Main limitation |
| Open box trailer | Materials and bulky loads | Easy loading from multiple directions | Limited tool security |
| Cage trailer | Materials plus bulky items | More carrying height | Tools remain more exposed |
| Tradesman trailer | Daily tools and equipment | Secure, organised storage | Less open floor space |
| Enclosed trailer | Large tool collections | Weather and security protection | Can be harder to access if poorly organised |
| Custom hybrid | Mixed tools and materials | Layout built around the carpenter | Higher upfront planning requirement |
The important point is that trailer size alone does not create a good work setup. A smaller trailer with properly planned access can be more useful than a larger trailer where tools are stacked randomly.
How should a carpenter divide trailer storage into zones?
A carpenter should divide the trailer into functional storage zones rather than treating the entire interior as one large compartment. Separate zones for daily tools, power tools, fixings, long materials, safety gear and job-specific equipment make the trailer easier to reset.
A useful carpenter layout might look like this:
| Storage zone | Typical contents | Access priority |
| Daily hand tools | Hammers, tape measures, squares, chisels | Very high |
| Power tools | Drills, impact drivers, circular saws | Very high |
| Cutting tools | Saws, blades and accessories | High |
| Fixings | Screws, nails, anchors and brackets | Very high |
| Measuring equipment | Levels, lasers and measuring tools | High |
| Long materials | Timber, trim and longer components | Medium |
| Ladders | Extension and step ladders | Medium |
| Safety gear | PPE, first aid and fire extinguisher | High |
| Job-specific gear | Special tools for current project | Based on job |
| Dirty equipment | Vacuum, extension leads and dusty gear | Medium |
This zoning approach is more useful than simply adding more shelves.
For example, if a carpenter uses a drill and impact driver on almost every job, those tools should not be stored behind timber, spare materials or rarely used equipment.
The goal is minimum wasted movement, not maximum storage.
Where should power tools and hand tools go?
Power tools should sit in dedicated cases, drawers or shelves where they can be reached without moving other equipment, while everyday hand tools should occupy a quick-access zone near the most frequently used entry point.
A carpenter may carry dozens of tools, but they are not all used equally.
Create three access levels:
Level 1: Daily-use tools
These are the tools you reach for constantly:
- Tape measure
- Hammer
- Screwdrivers
- Utility knife
- Pencils
- Combination square
- Drill
- Impact driver
- Common drill bits
Keep these close to the side or rear access door.
Level 2: Regular tools
These may include:
- Circular saw
- Reciprocating saw
- Jigsaw
- Router
- Planer
- Nail gun
- Laser level
These can sit in dedicated drawers or shelves immediately behind the daily-use zone.
Level 3: Occasional tools
Store equipment such as:
- Specialist cutting tools
- Large clamps
- Spare equipment
- Seasonal tools
- Project-specific tools
further away from the main access area.
Roshar’s tradesman trailer range includes features such as internal shelving, toolboxes, lockable storage, ladder racks, compressor boxes and tie-down points, which can be incorporated into a carpenter-focused layout.
How can you create better carpenter trailer tool storage?
Effective carpenter trailer tool storage uses drawers, labelled compartments, shelving and dedicated holders so that each tool has a defined location. The best storage system prevents loose tools from becoming a moving pile and makes the end-of-day reset quick.
1. Use drawers for small equipment
Drawers work well for:
- Drill bits
- Driver bits
- Blades
- Screws
- Nails
- Wall plugs
- Small hand tools
Instead of one large toolbox filled with mixed items, divide storage by task.
For example:
Drawer 1: screws and fasteners
Drawer 2: drill and driver bits
Drawer 3: blades
Drawer 4: measuring tools
Drawer 5: finishing accessories
2. Use vertical storage
Vertical storage makes better use of trailer walls.
Suitable items include:
- Levels
- Squares
- Clamps
- Extension leads
- Brooms
- Long hand tools
This frees valuable floor space.
3. Label storage locations
Labels become especially useful when multiple workers use the same trailer.
A simple label such as “90 mm screws”, “impact bits” or “saw blades” is faster than searching through several boxes.
4. Keep dirty equipment separate
Carpenters deal with sawdust, offcuts and debris. Keep vacuums, dusty equipment and waste-handling tools away from clean finishing tools where practical.
This is particularly important if the same trailer carries equipment used for both rough construction and detailed finishing work.
Where should timber, ladders and long materials be stored?
Long materials should be stored externally or in dedicated racks wherever practical, rather than being forced into the main tool-storage area. Ladder racks, roof racks and suitable material supports can free interior space while keeping long items organised.
A carpenter may need to transport:
- Ladders
- Timber
- Skirting boards
- Architraves
- Conduit
- Long trim
- Temporary supports
Trying to store these items diagonally through a trailer can block access to other equipment.
Use a dedicated ladder rack
A ladder rack keeps the ladder away from floor-level tools and leaves internal space available for equipment.
Consider roof or external racks
For long materials, external racks can provide a cleaner layout, but the rack and load must be suitable for the material and trailer configuration.
Use proper load restraint
According to the National Transport Commission, loads must be restrained so they do not endanger road users, exceed relevant mass limits or create dangerous overhangs. The NTC also identifies tie-down and direct-restraint methods as ways to secure light-vehicle loads.
Transport Victoria also advises that loads should be stable and evenly distributed across the vehicle or trailer, with suitable rated restraint equipment selected for the load.
That matters for carpenters because timber, sheets and long building materials can behave very differently from boxed tools.
How should heavy tools and equipment be positioned?
Heavy tools and equipment should be positioned low and distributed sensibly across the trailer rather than concentrated at one end. The finished load must remain within the trailer’s rated limits and suit the towing vehicle, towbar and braking configuration.
A common mistake is designing storage purely around convenience.
For example, a large compressor might fit neatly into one rear corner, but placing too much weight in one area can affect the trailer’s balance.
A practical weight-placement framework
| Item | Preferred storage direction |
| Heavy compressor | Low and close to the appropriate load area |
| Large saws | Low shelf or dedicated equipment bay |
| Power-tool cases | Mid-level shelving |
| Hand tools | Waist-height drawers |
| Small fixings | Easy-access drawers |
| Lightweight consumables | Higher shelves where secure |
| Ladders | External rack where suitable |
| Long timber | Dedicated rack or properly restrained deck area |
The actual placement must be checked against the finished trailer configuration and load requirements rather than relying on a generic layout.
Roshar’s custom trailer service allows the trailer size, flooring, axle setup, suspension, brakes, ramps, cages, enclosures, tie rails, storage and lighting to be planned around the intended application.
Should a carpenter choose an enclosed or open trailer?
An enclosed trailer generally suits carpenters who prioritise tool protection and secure storage, while an open or caged trailer suits carpenters who regularly carry bulky materials and need fast loading from multiple directions.
The decision depends on what dominates your working day.
Choose an enclosed setup when:
- You carry expensive power tools.
- Weather protection matters.
- Tools stay in the trailer between jobs.
- You want dedicated internal shelving.
- Security is a major concern.
- You prefer a mobile workshop layout.
Roshar offers enclosed trailer configurations in sizes including 6×4, 7×5, 8×5, 10×5, 10×6 and 12×6, with custom configurations also available.
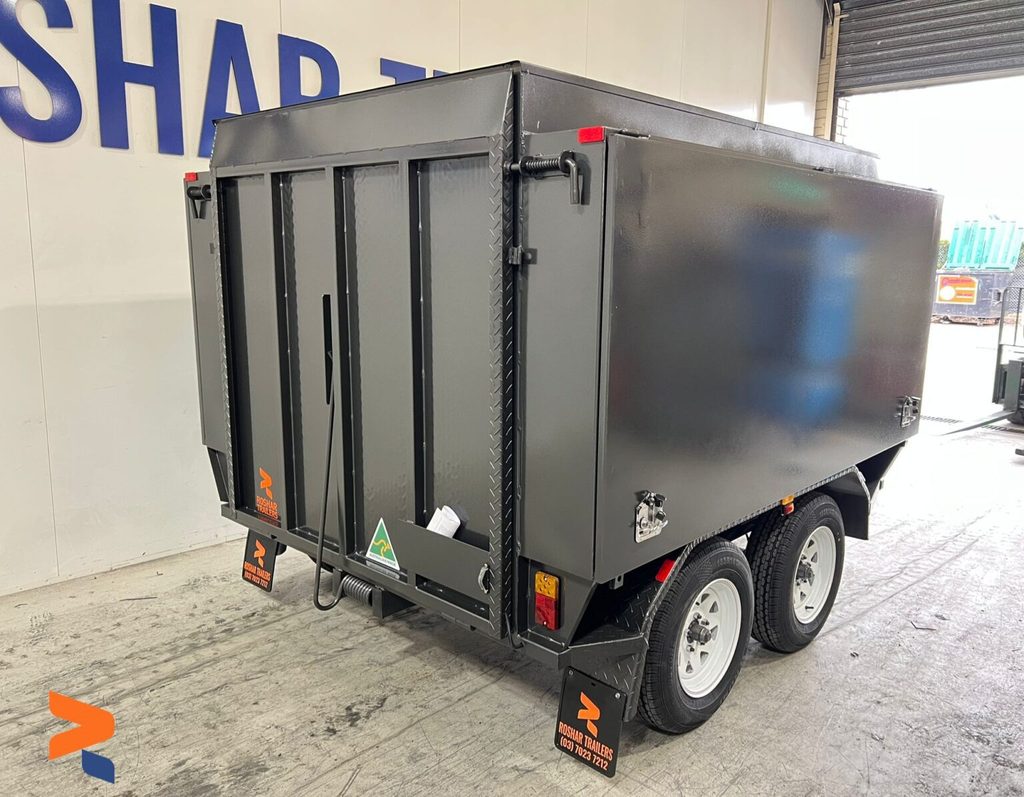
For buyers looking at enclosed trailers for sale Melbourne, the important comparison is not just internal volume. Look at door placement, shelving, access, floor layout, ventilation where relevant and how easily you can retrieve frequently used tools.
Choose an open or caged setup when:
- You carry timber and bulky materials regularly.
- Machinery or large equipment needs ramp access.
- You load from the side or with equipment.
- Fast loading is more important than enclosed storage.
- Your tools can remain in lockable boxes rather than the main trailer body.
A hybrid custom design can make sense when you need both secure tool storage and open carrying capacity.
How can you build a trailer setup that saves time on site?
A time-saving trailer setup puts the most frequently used tools nearest the main access point, groups equipment by task and creates a consistent return location for every item. The aim is to reduce unnecessary unloading, searching and repeated movement.
Step 1: List everything you carry
Action, write down every regular tool and material: include hand tools, power tools, blades, fixings, ladders, levels, PPE, consumables and specialist equipment.
Reason: you cannot design useful storage around items you have forgotten.
Step 2: Mark usage frequency
Action, classify each item as daily, regular or occasional: use the three access levels to decide where each item belongs.
Reason: high-use tools deserve the shortest path from door to hand.
Step 3: Measure bulky equipment
Action, measure your largest tools and cases before installing shelves: record width, height and depth rather than estimating.
Reason: storage that is 50 mm too small can become dead space.
Step 4: Create a long-material plan
Action, separate ladders and long materials from hand-tool storage: consider suitable racks, supports and restraint points.
Reason: long items can quickly block the trailer interior if they share the same space as daily tools.
Step 5: Set a weight plan
Action, place heavier equipment low and distribute the load sensibly: check the completed trailer’s tare, ATM, GTM and available payload.
Reason: a neat layout is not useful if the loaded trailer is incorrectly balanced or overloaded.
Step 6: Create a five-minute reset
Action, return tools, remove rubbish and check consumables at the end of each job: make the same reset routine part of closing the trailer.
Reason: the next morning should begin with a ready work trailer, not yesterday’s mess.
What should you check before choosing a carpenter trailer?
Before choosing a carpenter trailer, check the storage layout, trailer dimensions, payload, ATM, GTM, axle configuration, braking, access doors, racks, tie-down points, security and towing compatibility rather than comparing price alone.
A carpenter may be tempted by the biggest trailer available, but more space does not automatically mean better workflow.
Start with your actual work.
Carpenter trailer buying checklist
| Check | Why it matters |
| Trailer size | Determines available storage and manoeuvrability |
| Payload | Determines how much equipment and material can legally be carried |
| ATM/GTM | Helps establish the trailer’s rated limits |
| Tow vehicle | Must be suitable for the loaded combination |
| Storage access | Determines how quickly tools can be retrieved |
| Door placement | Affects workflow around the job site |
| Shelving | Keeps cases and equipment organised |
| Drawers | Useful for small tools and fixings |
| Ladder racks | Frees internal space |
| Tie-down points | Supports appropriate load restraint |
| Locks | Helps secure valuable tools |
| Flooring | Needs to suit regular trade use |
| Brakes | Must suit the trailer’s configuration and legal requirements |
| Custom options | Useful when standard layouts do not match your workflow |
For Australian trailers with an ATM of 4.5 tonnes or less, the Department of Infrastructure states that the applicable Australian Design Rules are relevant, with VSB 1 Revision 6 providing manufacturer guidance for common low-ATM trailer types.
That does not mean a buyer should rely on a generic rating. Ask the manufacturer to confirm the finished trailer’s actual specification and documentation.
How do you know when a standard trailer is no longer enough?
A custom trailer becomes worth considering when you repeatedly carry the same specialist equipment, lose usable floor space to awkward storage or spend time moving tools simply to reach other tools. A repeatable workflow is a strong signal that the trailer should be designed around the trade.
For example, imagine a carpenter who carries:
- Two drills
- An impact driver
- Circular saw
- Mitre saw
- Nail gun
- Laser
- Multiple levels
- Five tool cases
- Several boxes of fasteners
- Two ladders
- Timber trim
- Extension leads
- Dust extraction equipment
A standard box trailer may technically fit everything, but that does not mean it is a good working setup.
A custom layout could separate:
Side access: daily hand tools and fixings
Main shelving: power-tool cases
Lower storage: heavier equipment
External rack: ladders and long materials
Dedicated box: dirty or dusty equipment
Secure compartment: high-value tools
Roshar’s custom trailer range specifically allows buyers to discuss trailer size, load type, axle setup, ramps, cages, toolboxes, storage and industry-specific requirements.
Conclusion
A good carpenter trailer setup should make the workday simpler: tools should be easy to find, long materials should have a defined place, heavy equipment should be positioned sensibly and valuable gear should remain protected.
For carpenters comparing tradesman trailers or tradesman trailers for sale, start with the work you do every day and build the layout around it.
If a standard configuration cannot give you the access, storage or loading arrangement you need, custom trailers can provide a more practical solution.
Roshar Trailers has locations in Braeside, Bayswater North and Dandenong and builds trailer solutions for Melbourne tradies and businesses.
FAQ’S
Can I leave my tools in a trailer overnight?
Yes, but security should be treated as a separate consideration from storage. Use properly secured lockable compartments, avoid leaving high-value equipment visible, park thoughtfully and consider additional trailer or coupling security. Your insurance policy may also have specific requirements for tools left in vehicles or trailers.
How can I stop sawdust getting into my trailer storage?
Use closed cases for sensitive equipment, seal gaps where practical and separate dusty tools from clean finishing equipment. A dedicated area for dust extraction and regular sweeping can also help. Avoid storing precision tools directly beside loose sawdust-producing equipment when the trailer is used for multiple types of carpentry.
Should a carpenter carry materials and tools in the same trailer?
Yes, if the trailer has enough capacity and the layout separates them properly. Tools can be stored in lockable compartments while timber and longer materials use racks or dedicated deck space. The key is preventing materials from blocking tool access and ensuring the complete loaded trailer remains within its rated limits.
Is an 8×5 trailer big enough for a carpenter?
Yes, an 8×5 trailer can be a practical starting point for many carpenters, but the correct size depends on the tools, materials, equipment and towing vehicle. Roshar offers an 8×5 tradesman configuration, while larger or custom builds can be considered when the workload requires more capacity.
Should a carpenter choose single axle or tandem?
It depends on the finished load and trailer requirements. A single axle can suit lighter, more compact setups, while tandem configurations can suit larger trailers and heavier or more frequent loads. The decision should be based on the completed trailer rating, payload, towing vehicle and intended use rather than axle count alone.
Can a carpenter customise the internal trailer layout?
Yes, customisation can include storage, shelving, toolboxes, racks, ramps, tie rails, flooring and other configuration changes. The most useful customisation starts with an inventory of the tools and equipment you actually carry, followed by measurements and an access plan rather than simply adding as many storage compartments as possible.